Easy Installation

Capital In-ground Trampoline Kits have been designed for easy assembly and installation. Most of our customers do the assembly and installation themselves, or with the assistance of family and friends.

If digging isn't your thing, you can simply use a local gardening or landscape company or even employ a local handyman just to help you with the digging of the hole.


Rectangular installation video

We take you step-by step through the installation of a rectangular Capital In-ground Trampoline. This video is a 'must-watch' if you are about to install one of our trampolines in your backyard.

Round installation video

We take you step-by step through the installation of a round Capital In-ground Trampoline. This video is a 'must-watch' if you are about to install one of our trampolines in your backyard.

How to dig the hole

Trampoline size / outer hole diameter Inner hole diameter Hole depth
Round 8ft 6ft 30"
10ft 8ft 30"
12ft 10ft 36"
14ft 14ft 36"
Rectangular 10ft x 6ft 8ft x 4ft 30"
11ft x 8ft 9ft x 6ft 30"
14ft x 10ft 12ft x 8ft 36"
17ft x 10ft 15ft x 8ft 40"

Step-by-step guide

A step-by step guide to installing your Capital in-ground trampoline. Full instructions come in the box and our team are always on the end of the phone if you have any questions.

Step 1. Dig the hole

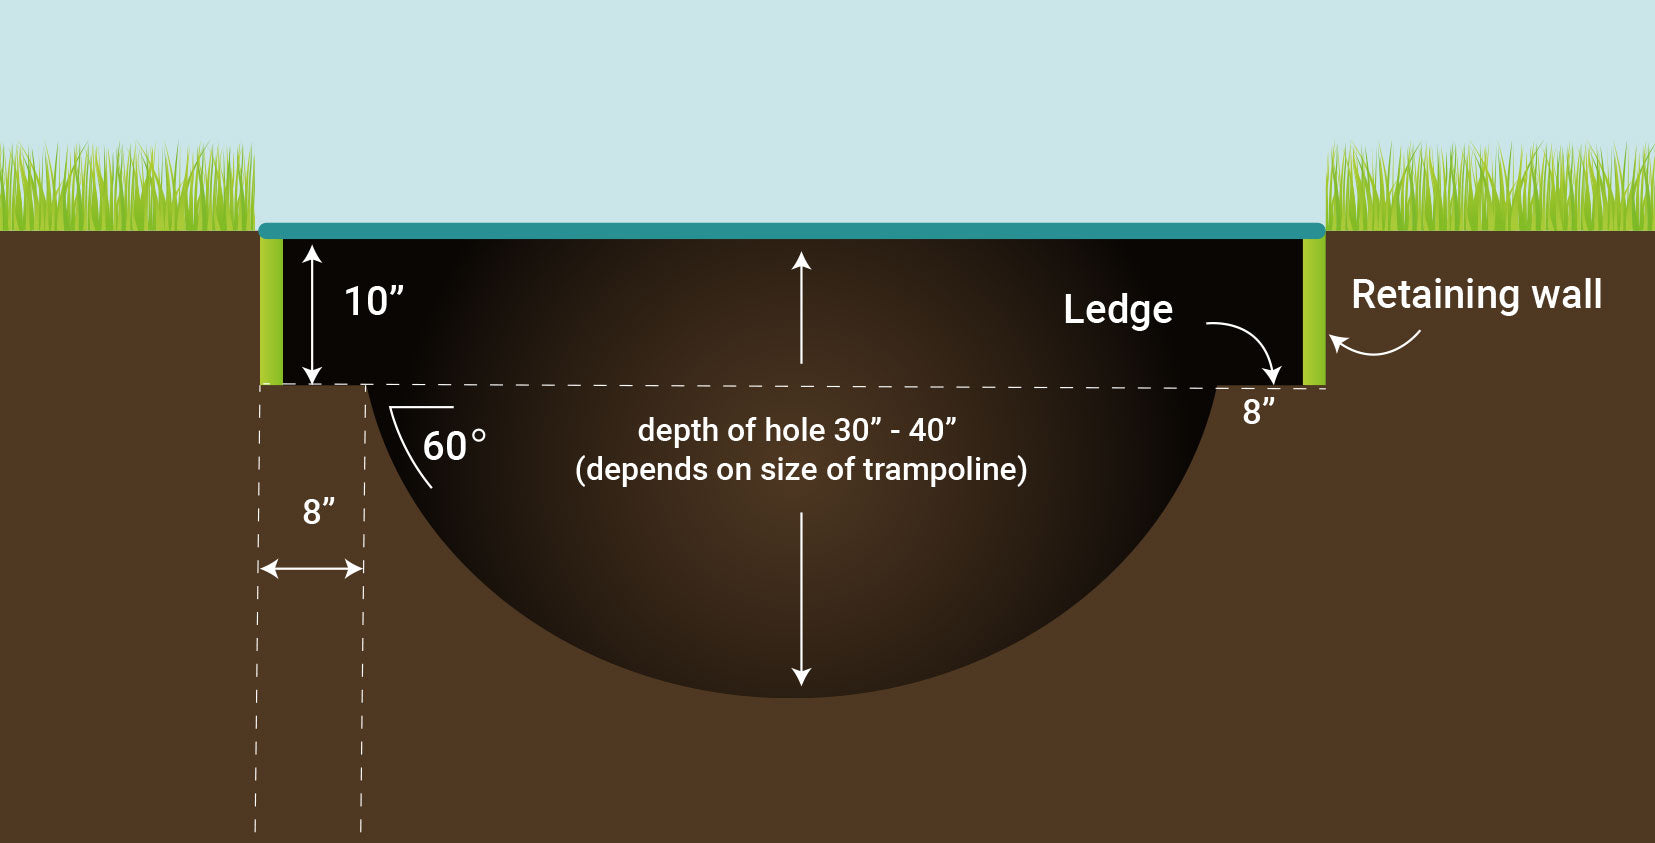
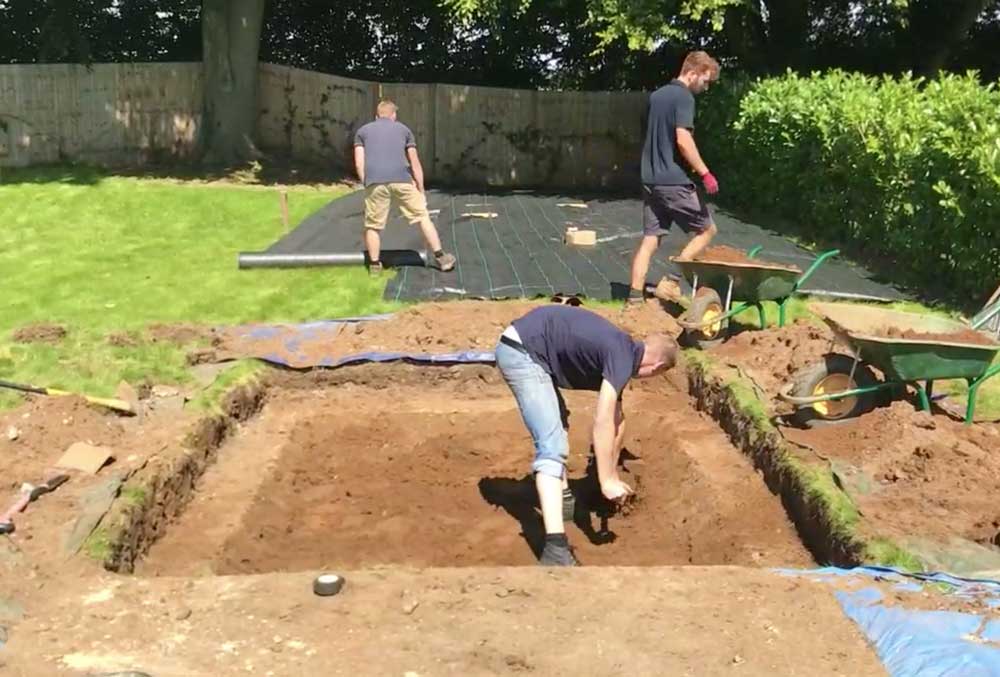
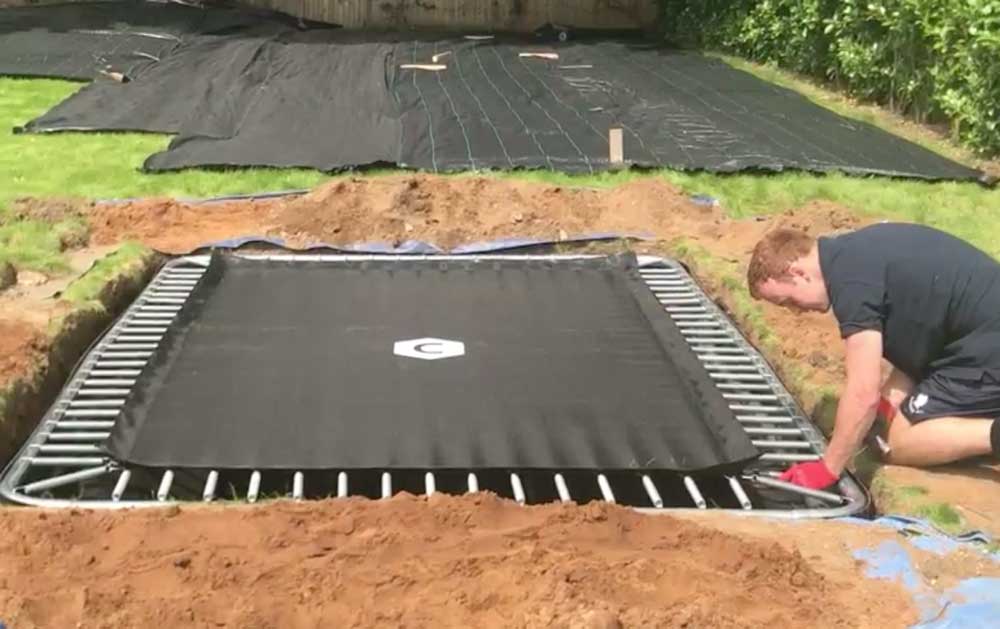
Mark out a hole that is a few inches wider in diameter than your trampoline. This is to give you a little extra room when you place the trampoline in the hole.

Dig out 10 inches of soil evenly across the entire hole. Then dig an inner hole in the middle that is 2ft less in diameter than the trampoline size in a bowl shape to a depth of 40 inches for the 17ft x 10ft, 36 inches 3ft for 12ft and 14ft trampolines and 2ft 6 inches for 8ft and 10ft trampolines. This will leave a ledge onto which the trampoline frame will sit.

TOP TIP
It's hard to be precise with the hole measurement - the extra few inches will make it easier for you. This extra space will be back-filled at the end. Keep some of your excavated top soil close by the hole for back filling.

Step 2. Assemble the frame

Assemble the top and bottom sections of the trampoline frame, attach mat and springs and fix the retaining wall to the outside of the frame.

TOP TIP
Attach springs at 12 o'clock position, then 6 o'clock followed by 3 o'clock and 9 o'clock first - this will give even tension and make it easier to fit the rest.

Step 3. Site the trampoline into the hole

Lift the trampoline into the hole and place on the ledge ensuring the frame is at the correct height. Then back-fill in the gap on the outside of the frame, compact the soil and re-turf.

TOP TIP
Use the handle of your spade to compact the soil down as tight as possible when back-filling.

Step 4. Attach the vented pads

Finally attach the TDU vented pads to the frame & you're ready to enjoy your In Ground Trampoline!

TOP TIP
Use a long screwdriver to help push the elasticated toggles down between the trampoline frame and the retaining wall in order to secure the pads to the trampoline.

How long will it take to install?

Our trampolines have been designed to install yourself, how long it takes depends on the size of trampoline you choose and whether you dig by hand or hire an excavator. Digging by hand we'd say allow a weekend to complete the job, if you hire an excavator you'll easily do it in a day.

Do I need to build a retaining wall?

No! Our in-ground trampoline kit has a retaining wall built in, making it even easier to install at home. The retaining wall easily screws onto the frame into pre-drilled holes.

Do I need to hire an excavator?

This depends on the size of trampoline you choose and how energetic you're feeling! We'd recommend digging the 8ft and 10ft sizes by hand as it's actually easier to get the bowl shape you need with a spade than an excavator. But for the largest sizes hiring an excavator will definitely make less work for you.

How much soil do I need to excavate and how do I dispose of it?

The amount of soil you need to excavate will vary depending on which size trampoline you are installing. For the smaller size trampolines you will fill a 6-yard skip (10ft x 6ft, 8ft) for the medium size trampolines you will fill an 8-yard skip (10ft and 11ft x 8ft) and for the larger trampolines (12ft, 14ft, 14 x 10ft and 17ft x 10ft) you may need to arrange for a grab lorry to come and collect the soil. If you are able to use the soil in your garden for raised beds or levelling ground etc. then you will save the cost of a skip or grab lorry!

Will I need to add drainage beneath the trampoline?

In most cases, a simple soak away as described in the instructions should be sufficient to ensure your trampoline pit drains well. For some gardens that have a high density of clay you may need to consider alternative drainage options such as the ones outlined in our blog.

How much room should I leave around my trampoline?

If you do not have a net on your trampoline then you should leave at least 1.5m around the perimeter of the trampoline to avoid the user bouncing off the trampoline into a potential hazard such as a tree or fence. You should also make sure that there are no hard surfaces within this area such as a stone pathway.

How do I look after my Capital In-ground Trampoline?

Fortunately, the Capital In-ground Trampolines are relatively maintenance free! It always helps to prolong the life of your trampoline pads and jump mat if you purchase a cover. Likewise keeping your trampoline clean of general garden debris such as fallen leaves, twigs and mud will help maintain all elements of the trampoline. We recommend that you check all parts regularly and replace any worn out parts as soon as you notice them.